CHILI GraFx-Studio Connector
Introduction
The "GrafX Studio" is part of the "GrafX-Platform" from CHILIpublish. The "GrafX-Studio" is working side by side to the "GrafX-Publisher" (formerly known as Chilipublisher. Currently it has a strong focus on digital, animated output. In the future it will replace the well known "GrafX-Publisher" and you can create "Smart Templates" for versatile output of Digital, Animated, and Print Graphics.) with one tool.
The "GrafX-Studio-Connector" for Magento connects the leading eCommerce platform "Magento 2.x" with the "GrafX-Studio" seamless. Use the "GrafX-Studio-Connector" side by side with the existing "GrafX-Publisher-Connector" (CHILIConnector) for the "GrafX-Publisher" from CHILIpublish.
Please note: The "GrafX-Studio-Connector" is a "work in progress". We currently working hard to migrate all necessary features from the well known "GrafX-Publisher-Connector (CHILIConnector)" to the "GrafX-Studio-Connector"-extension. This extension is not ready for production actually, since CHILIpublish is currently working on the final "Grafx-Studio" too.
Features-Overview (work in progress)
Frontend-Integration
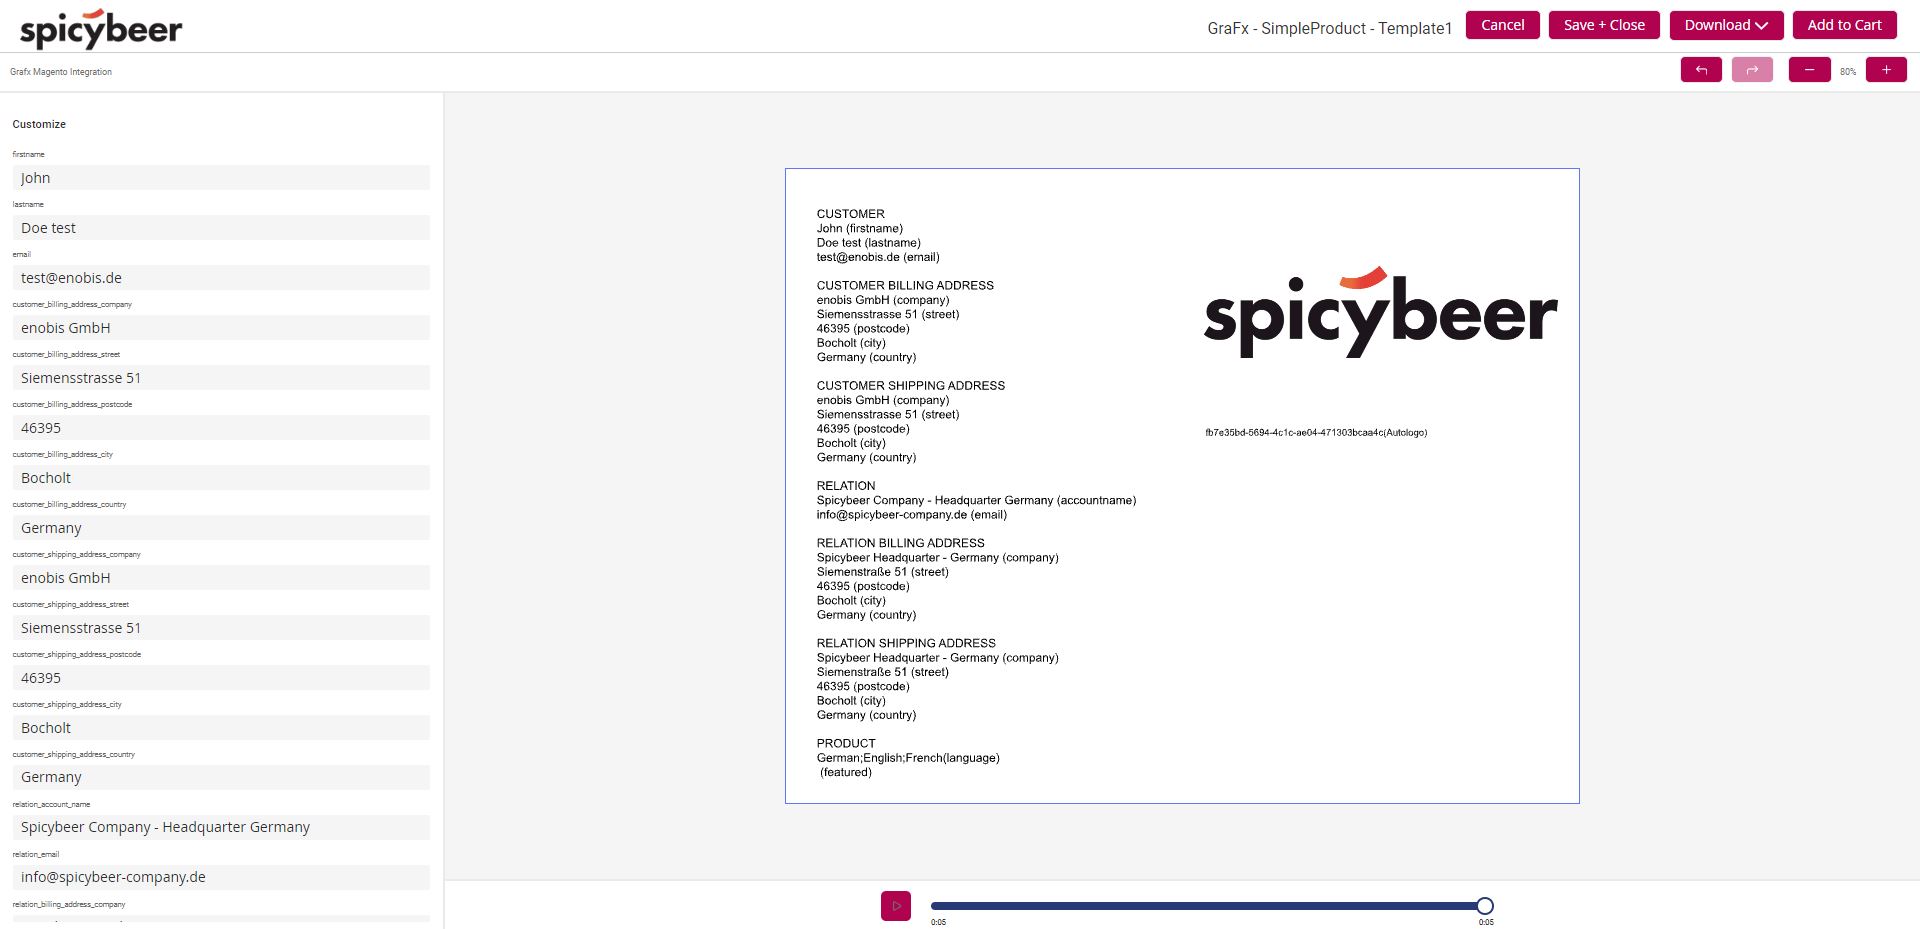
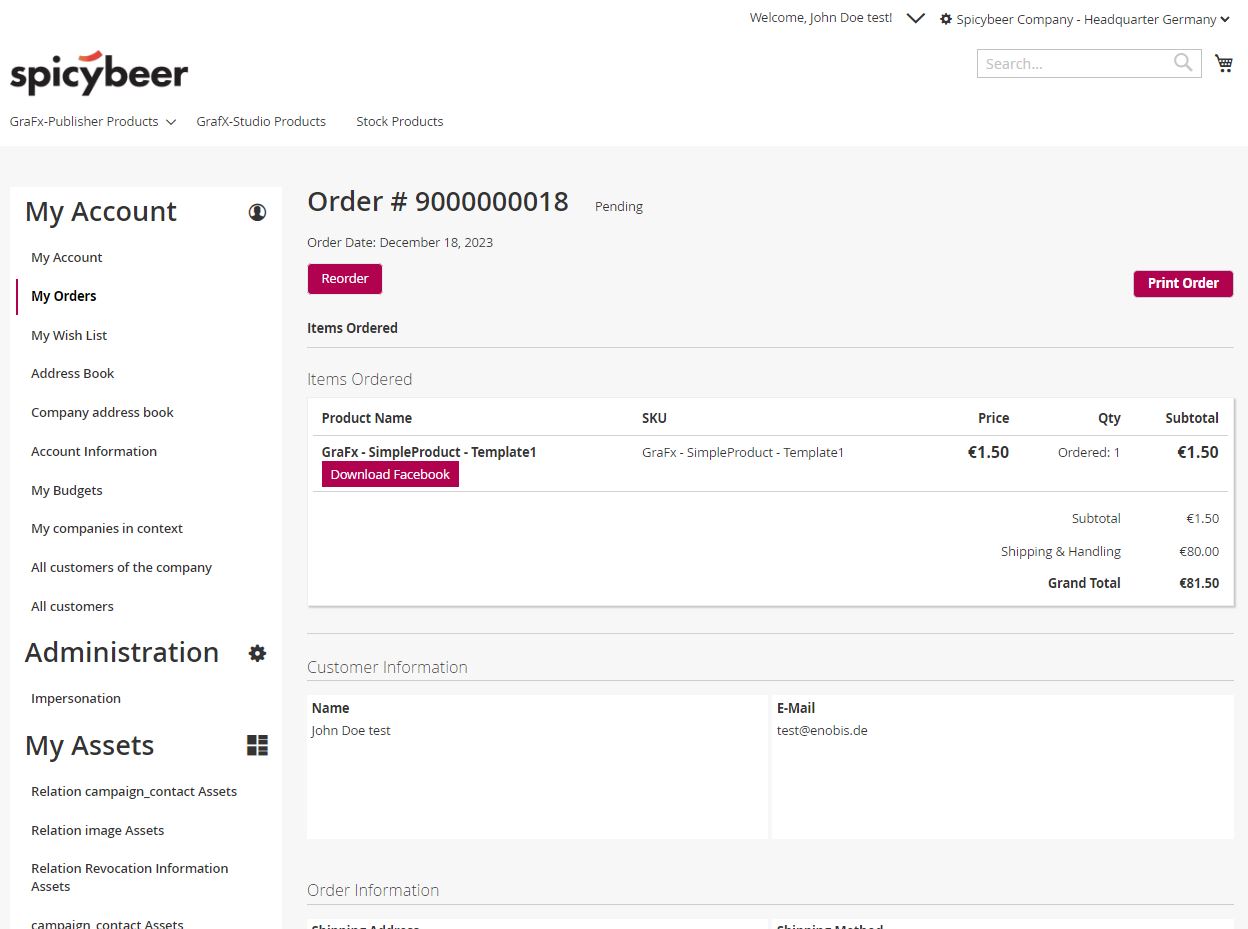
The "GrafX-Studio-Connector" integrates the "GrafX-Studio" from CHILIpublish into the storefront of Magento2.x. It is integrated into several areas of the Magento storefront like (separate editor page, cart, wishlist and order details) and backend (order management).
Editor Page
The editor page integrates the GrafX-Studio in the storefront of Magento2.x as a separate editor page with a separate route. This ensures the best user experience and best compatability with the Magento standard.
Personal drafts in wishlist
Save document drafts in wishlist (coming soon!)
Support for various render settings
The "GrafX-Studio" supports various output formats like mp4, gif (animated gif), jpg and pdf (experimental). The "GrafX-Studio-Connector" gives you the ability to use all of these render functionalities and customize them on each product.
Integration of CHILIpublisher Javascript-API
With the Javascript-API it is possible to manipulate documents in the browser. E.g. it’s possible to insert data into a document to generate a better and stronger user experience. It is possible to push
- customer-
- customer-address and
- product- attribute values
to documents variables.
Backend-Integration
The "GrafX-Studio-Connector"-Extension for Magento2.x is designed to be a "Plug-and-Play" solution. The "GrafX-Studio-Connector" comes with several configuration parameters to make the integration as easy as it could be.
- Integration of GrafX-Webservices via Backend configuration
- Configuration of Renderers (storefront specific or product specific)
Integration REST API of "GrafX-Studio"
The "GrafX-Studio"-API is used for various aspects of "GrafX-Studio"-integration. The API is needed
- to create valid editor sessions
- to generate (working copies) of documents
- to inject data into a document
- to generate document previews as images (coming soon!)
- to render documents according their renderer settings to various output formats like Mpg4, animated gif, jpg, html and pdf-formats.
Images


Initialisation // Setup
The Initialisation // setup of the "GrafX-Studio-Connector" is as easy as it could be.
Estabilishing connection to CHILI-Server
In order to establish the connection to the CHILI-GrafX environment, you must create an integration in the CHILI-GrafX-environment first. Each integration gives you
- Grafx Client Id / Api User
- Grafx Client Secret / Api Key
To connect a Magento2.x-system to a CHILI-GrafX-environment please provide the following information/ data:
- Grafx Webservice Url (Standard: https://integration-login.chiligrafx.com)
- Grafx Baseurl (e.g. https://your-environment-id.chili-publish.online/grafx )
- Grafx Environment: your-environment-id
- Grafx Client Id / Api User: CLient ID from integration
- Grafx Client Secret / Api Key: Client Secret from integration
- Grafx Frontend Client Id / Api User (experimental): provide the same client id from integration (see above)
- Grafx Frontend Client Secret / Api Key (experimental)(experimental): provide the same client secret from integration (see above)
For information:
As Magento2.x supports multi-site setups, this configuration can be configured for different scopes.
With this configuration options it is possible to
- connect several websites to one environments
- connect several websites to different environments
- connect several websites to different chili servers
Enabling GrafX-Studio in the storefront
The Integration of the "GrafX-Studio" in the storefront is disabled by default. To activate it, you must “enable” it first. The "GrafX-Studio" is now ready to be used by the storefront user.
Output render settings
The "GrafX-Studio" supports rendering of various types of output like:
- jpg
- gif (animated gif)
- mpg4
- pdf (experimental)
- html (upcoming)
The "GrafX-Studio-Connector" supports all of these renderer functionalities by it's "advanced renderer"-feature. It supports:
- creating different renderer profiles
- configuration of renderer profiles at different scopes: Global, Website, Storeview and Product specific
- activation of renderer profiles in different renderer areas (editor page (default), storefront-order, backend-order (coming soon), emails (coming soon)
Configuration-Parameter
Please note: These documentation referes to the latest module version only! - Module is currently under development!
Stores->Configuration->GrafXStudio->GrafX-Credentials
Option Type Description Scope Grafx Webservice Url String URL to GrafX-Webservice - Standard is "https://integration-login.chiligrafx.com"
System->Storeview Grafx Baseurl String https://your-environment.chili-publish.online/grafx System->Storeview Grafx Environment String Name of GrafX-environment (your-environment) System->Storeview Grafx Client Id (Api User) String Client Name System->Storeview Grafx Client Secret (Api Key) String Client Secret System->Storeview
Grafx Frontend Client Id (Api User) String Client Name (currently under development - please provide here also the Grafx Client Id (see above) System->Storeview
Grafx Frontend Client Secret (Api Key) String Client Secret (currently under development - please provide here also the Grafx Secret (see above) System->Storeview
If everything is setup correctly, your configuration will be saved and you are now able to access some enviromental data in the other configuration tabs.
Stores->Configuration->GrafXStudio->GrafXStudio->Default Values
Option Type Description Scope Document Naming Type Dropdown DocumentID (Default) System->Storeview
Stores->Configuration->GrafXStudio->GrafXStudio->Frontend
Option Type Description Scope Enabled Yes, No (Default) Enable the Chili-Editor in Storefront System->Storeview, Product->Storeview
Show Edit Document Link In Cart Yes (Default), No Enables a link to edit the document from the cart directly. System->Storeview
Assign Account Relation Attributes to Chili Yes, No (Default) When this feature is enabled the attributes that are marked for chili, of the active Company Account are assigned to Chili
Important: Company_Relation-Extension needed!System->Storeview
Stores->Configuration->GrafXStudio->GrafXStudio->Advanced Settings
Option Type Description Scope Enable Logging Yes, No (Default) Enable to log each Soap Call to a file var/log/grafx_rest.log Attention this reduces performance and should be only used for debugging purposes System->Storeview
Stores->Configuration->GrafXStudio->GrafXStudio Advanced Renderer->General
Option Type Description Scope Grafx Advanced Renderer Configuration Grid Enables the selection of default renderer settings.
- Label: Label of renderer in storefront
- GraFx Advanced Renderer: Selected renderer configuration from GraFx Advanced Renderer Configuation area
- Display Area: Area for renderer link in storefront: Possible values: Default (Editor), Order (Order details), Email (work in progress), (Backend: to be defined)
System->Storeview
GraFx>GrafX-Advanced Renderer>
Offers the possibility to create renderer settings based on the renderer defintions of CHILI GraFx API.
Option Type Description Scope Name String Name of renderer Global Renderer Type Select List of possible renderer types, like mp4, jpg, png. etc. Global GraFx Json String Json of renderer definition, e.g.{"layoutToExport": 0, "outputType": "mp4", "fps": 60, "pixelRatio": 2} Global
Bestpractices & Faq
Bestpractice "Preassign Magento data to chili documents"
The "GrafX-Studio-Connector" enables you to preassign data from different entities of Magento2.x in a chili document. Supported are
- customer- and customer-address attributes
- product attributes
Customer- and Product Attributes
To activate preassignment for customer-related data, please go to your “customer_eav_attribute”-table of your Magento2.x database, find your attribute and set the column “used_for_chili_document” to “1”. The values of the activated attributes will be automatically pushed to the corresponding attribute (with the same name) of the chili document.
To activate preassignment for product-related data, please go to your “catalog_eav_attribute”-table of your Magento2.x database, find your attribute and set the column “used_for_chili_document” to “1”. Or you can just go to Stores->Attributes->Product and activate the "Used for CHILI"-option. The values of the activated attributes will be automatically pushed to the corresponding attribute (with the same name) of the chili document.
So it is very important to define the Chili Variables according to the attribute name (attributecode) of Magento2.x, as these are the appropriate “matching” criteria. E.g. to preassign the values of
- “Customer-attributes” like “firstname”, “lastname” or “email” from Magento2.x to your chili document, please create a variable with the according variablename. “attributecode” = “variablename”
- “Customer-Address-Attributes” To preassign the values of the “street” attribute, please create a chili variable “customer_shipping_address_street” or “customer_billing_address_street” (to load the data from either the default shipping or default billing address)
- product attributes: For a attribute like “color”, just create a chili variable “color” and activate that feature.
Module
extension-name: enobis/module-grafx-studio
Latest version
version: 0.4.30Install & Update
First you need to add our private repo to your composer.json of your magento installation:
composer config repositories.enobis-your-reponame composer https://satis.enobis.de/customers/your-reponame/
Important: All repos are secured by an ip-protection or an user-authentication. Access Credentials are provided by us!
To install the CHILIconnector-extension use composer via ssh:
composer require enobis/extension-name
To update the CHILIconnector-extension use composer via ssh:
composer update enobis/extension-name
Afterwards you have to complete your Magento2.x installation by
php bin/magento setup:upgrade
php bin/magento setup:di:compile
php bin/magento setup:static-content:deploy
php bin/magento cache:clean
php bin/magento indexer:reindex
Changelog
- - 0.4.30 optimization - several optimizations
- 0.4. compatibility - compatibility with CHILI GrafX-Publisher-MyDocuments
- 0.3 optimization - added support for rendering, introdution of enobis/module-grafx-studio-advanced-renderer
- 0.2 optimization - add base functionalities, introduction of enobis/module-grafx-core and enobis/module-grafx-debug-logger (requirements)
- 0.1 - Initial release
Roadmap
- support for saving drafts incl. document naming
- support for configurable products
- support for frontend document approval workflows
- support for bundled productsPrerequisites
Our extensions are not available via the magento-marketplace or packagist.org! The extensions are only available via a (private) repository!
In order to get access, a valid license-agreement is required!
If you have no access to our repositories, please contact us!
Addons
The following modules will be available as addons:- enobis/chiligrafx-document-lifecycle (soon)
- enobis/chiligrafx-document-workflow (upcoming)
- enobis/chiligrafx-bundle (upcoming)
Support
If you need help using one of our extensions, please get in touch with us by sending us an email to support@enobis.de.


